CONSTRUCTING A SUMP TANK IN INDIA
- meu medium
- Feb 16, 2023
- 3 min read

A sump tank is an essential part of a house. The tank is constructed underground and is used to store water for all domestic purposes. Water from the sump tank is pumped to an overhead tank and is then used. This post forms part of the “Story of a home” series and illustrates how to go about the construction of a sump tank.
What you will need :
Around 2000 table molded bricks (each costing around 4-5 rupees depending on where they are being brought in from)
Around 8-9 bags of good quality cement
3 bags of cement for plastering purpose
A good amount of water to be used for construction and curing (watering of the setup)
Chicken mesh
Method :
* 1cubic feet will approximately contain 27 liters of water.
Excavation of the required portion of land where the sump tank is going to be located is done. Excavation charges should range between 6-7 rupees per cubic feet. While considering the dimensions of the sump tank, the consumption of water by the inhabitants of the house must be taken into consideration. On an average, a household of four members; father, mother and two children, would approximately require 6000 liters of storage in the Sump tank. So sump dimensions can be assumed based on the equation provided above. Also, a maximum of 6’ depth for sump and not more should be excavated.
Once the excavation is done, the bottom of the pit is lined with 5 – 6 layers of jelly (small pieces of broken granite) alternating with layers of concrete mix. This layer should then be allowed to dry for a day.
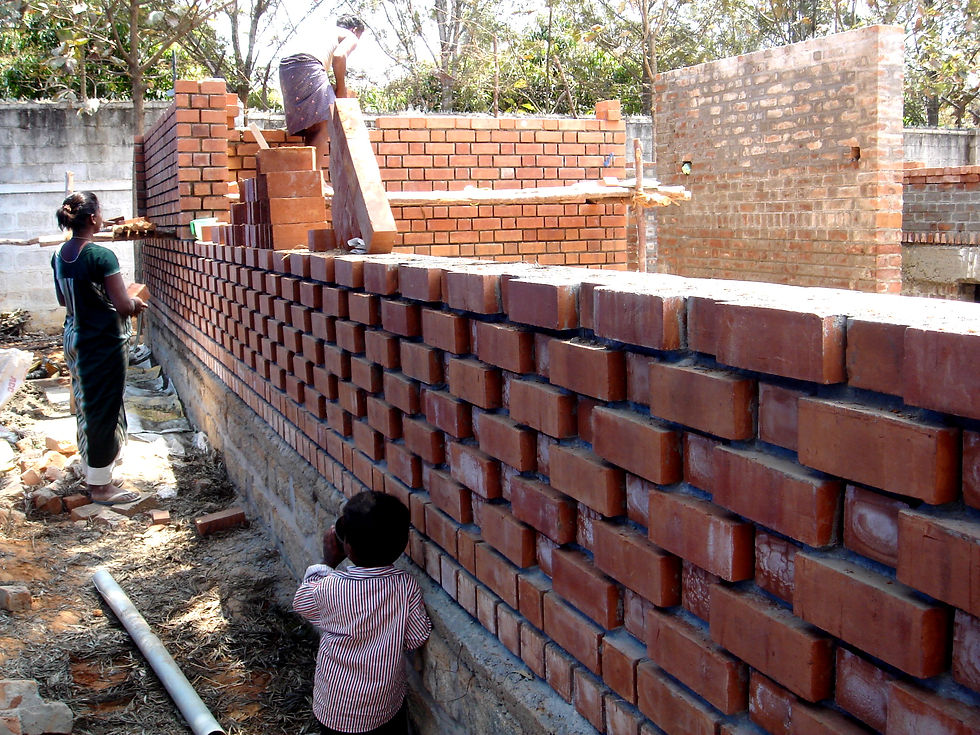
Next construction of the walls of the sump begins. A normal 9” brick wall is constructed. Note: A gap of at least 6” from the mud embankment should be left on all sides before starting the wall. Care should be taken that all the walls are at perfect 90 deg. Also, 2 or 3 stepping- down stones should be introduced in the tank to facilitate ease of access for cleaning purposes later on.
After construction of the walls, it is left to dry over night.
A layer of chicken mesh is nailed onto the entire inner surface of the tank.
A thick even layer of concrete is spread over the surface of the chicken mesh.
The sump is then left to dry for a minimum of 6 days. Curing is in progress, i.e. pouring water evenly over the plastered surfaces of the sump. This is done to help the plaster bind well with the surface it has been applied on.
In the meantime the remaining gap between the sump and the embankment is filled with fine sand. This is done in layers by putting one layer of sand (around 1’6”) and then a good amount of water in between. This facilitates the settling of sand and by removing air pockets. This compacting creates an inward even thrust to counter the outward thrust of the water that the sump will hold, and hence prevent cracks from forming. This is a crucial step.
The sump is then ready for use after 6 days.
Note: Provision for piping for inlet and withdrawal of water has to be considered in the process of construction.

A completed sump tank

Chicken mesh on surface
Gap around tank

Stepping stone
Other Considerations :
As mentioned above piping considerations for water inlet and withdrawal must be taken into account while designing the sump tank. The placement of the sump tank is also important. The tank should be placed at a safe location and its distance from the overhead tank should be as small as possible. The greater this distance the more the money and electricity that will be needed to lay the pipe-work for the sump tank to overhead tank connection and also for pumping water to a far away tank.